This is a guide to set up a simple L2TP VPN connection.
My mac mini server has mountain lion osx v. 10.8.2. I have also signed up for a “domain” at http://www.no-ip.com/. You may want to make sure you can ssh to your server first from the outside network before moving forward.
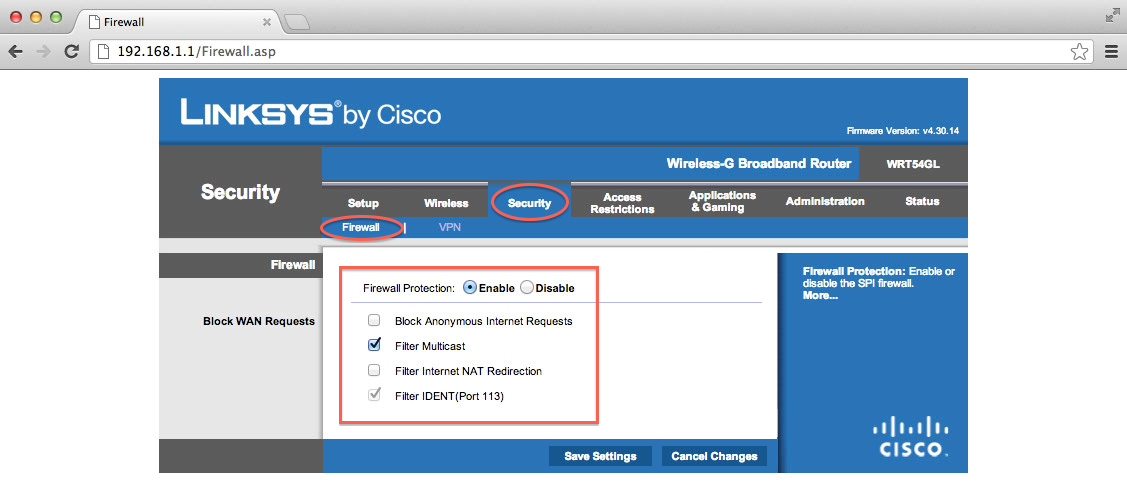
I have my server behind a linksys router so I need to set up the router first. Bring up the router page, mine is at 192.168.1.1. Then click Security -> Firewall. Then uncheck the Block anonymous Internet Request. Yea, sounds scary isn’t it? Then click Save Settings, the router blacks out, then comes back.
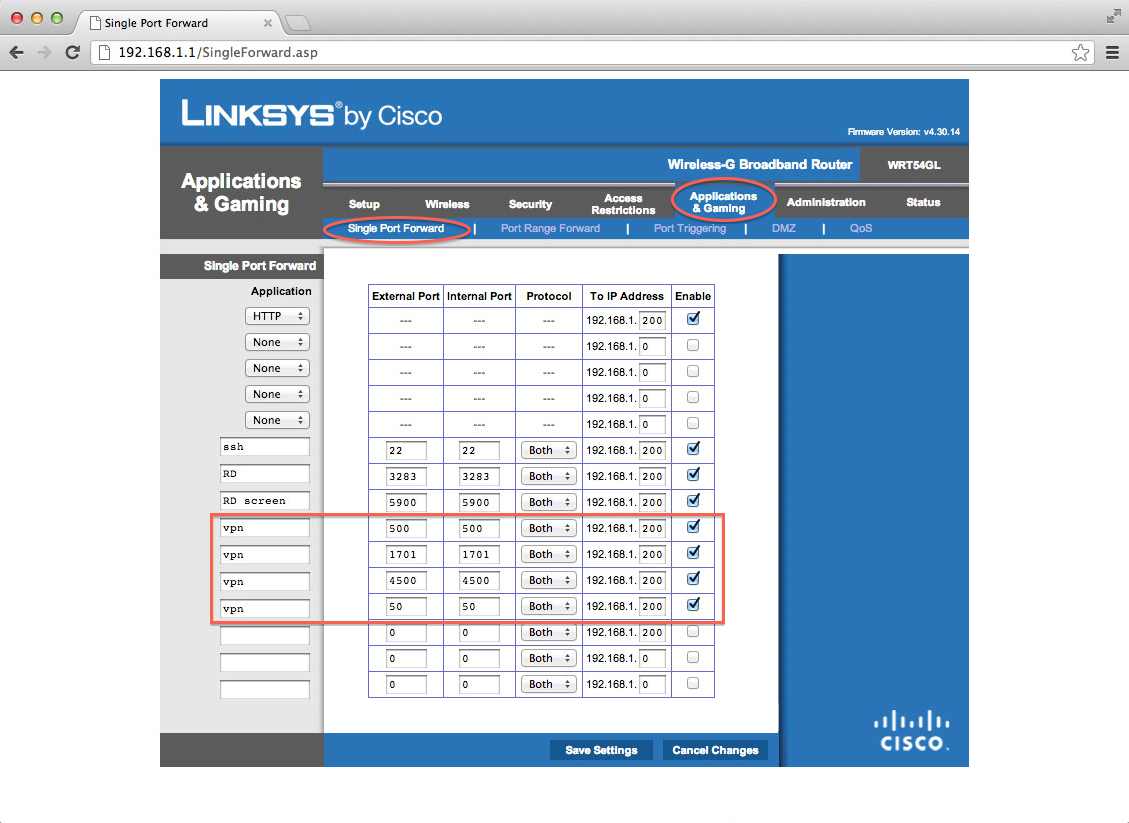
Next, click Applications & Gaming -> Single Port Forward. This is where you put in all the port forwarding info for our VPN service. The port you will need to forward are: 500, 1701, 4500, and 50. They will need to get forwarded to your server IP.
Then open up your Server Application. Go to the VPN window. Pick L2TP. The host name is how you refer to your server in your local network, could be anything. The Shared Secret is important, and you will be handing this out to your users later. After filling out all these, switch on the VPN server on the top right.
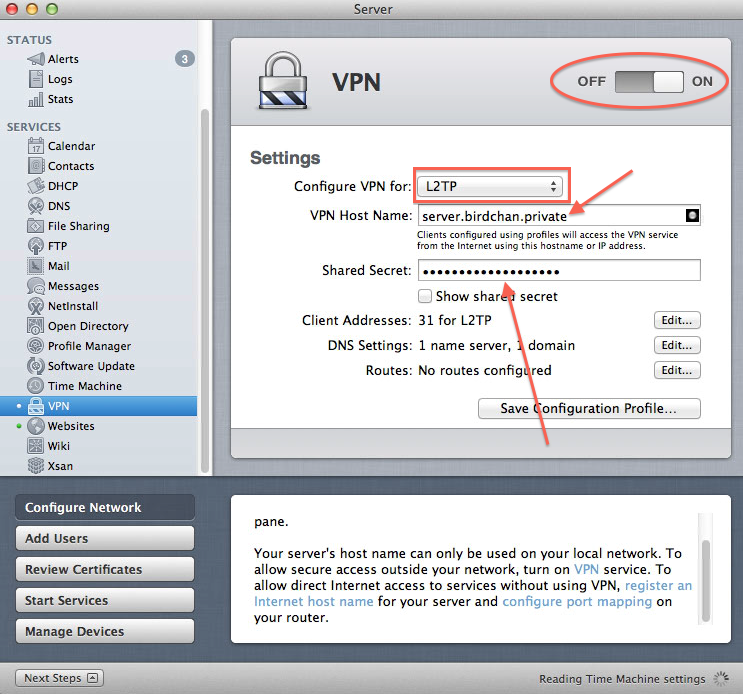
Your VPN server is now setup.
Now on the client side. Open up System Preferences, then click Network. Create a VPN, L2TP over IPSec connection profile. Then start filling in the fields. The Service Address is, for example, the one I get from no-ip.org. The Account Name is a valid username on your server.
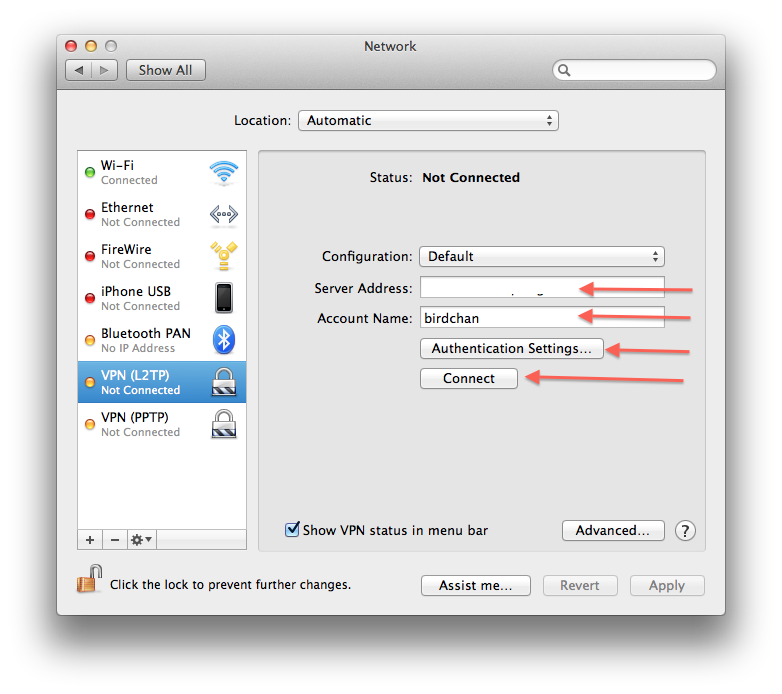
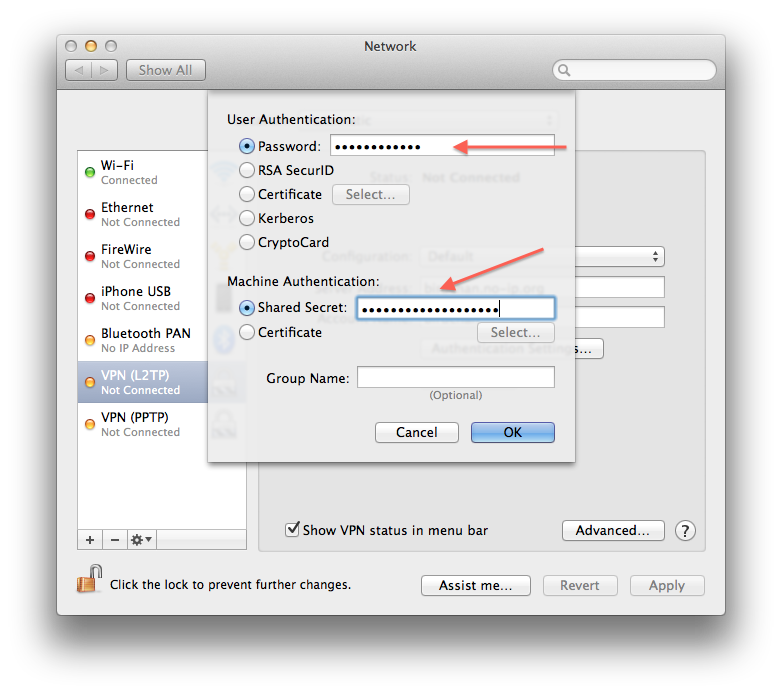
Then click on the Authentication Settings… button. This is where you put in the user’s password, and the Shared Secret that we put in earlier on the server. When done, click ok.
Then click the Connect button. Cross your fingers…
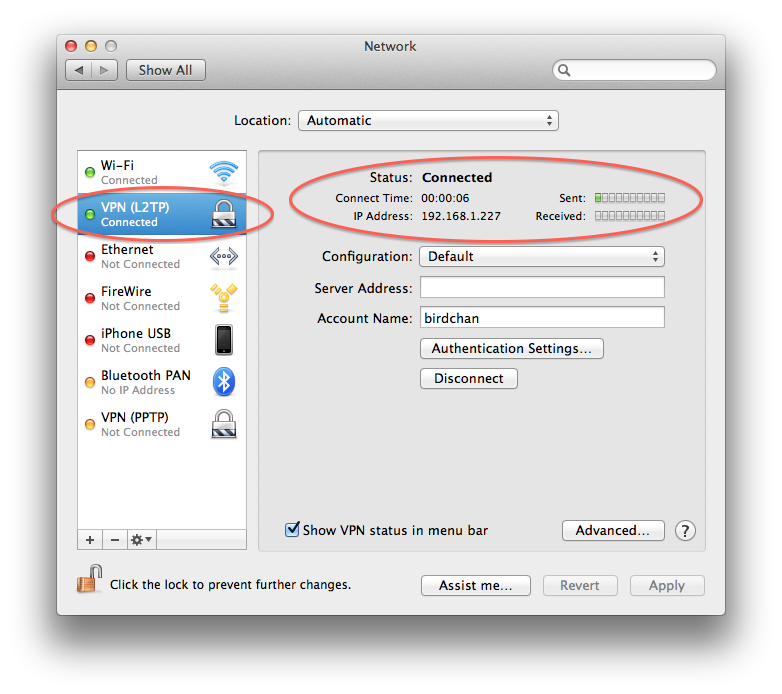
Hopefully you will see the green light for your VPN connection! If you want to double check whether you are on your private network, you can try ssh to one of your machines in the 192.168.1.x address range and see how it goes.
Happy VPN’ing!